
Seawall Repair in Wisconsin: When to Repair, Replace, or Rethink the Shoreline
The cap sits a few degrees out of level now, tipped toward the water. There is a gap between the back of the wall and the lawn that was not there five summers ago, wide enough to lose a sandal in. Nothing has failed yet. The wall still holds the yard up, and the dock still lines up with it. But every spring after ice-out, it looks a little more tired.
Seawall repair on a Wisconsin lake is a different problem from seawall repair on the coast. Most of what you will find online is written for saltwater walls in Florida, where the threats are salt, storms, and tides. Lake Country walls face ice, frost, and saturated soil instead. Those forces break walls in a predictable order, and knowing that order is how you decide whether a wall needs repair, replacement, or a different approach altogether.
How seawalls fail on Wisconsin lakes
A vertical seawall on an inland lake takes the same set of loads every year, and the damage builds slowly.
Toe scour. A vertical face reflects wave energy back into the lake instead of absorbing it. Over time that reflected energy scours the lake bed at the base of the wall. Once the toe loses support, the wall has nothing holding its bottom edge in place.
Ice push. As sheet ice expands across the lake in winter, it pushes horizontally against anything at the shoreline. A wall that is already losing support at the toe starts to rotate, with the top tipping lakeward a little more each winter.
Hydrostatic pressure. Water trapped behind a wall pushes outward. Walls are built with drainage, such as weep holes, filter fabric, and free-draining backfill, to let that water out. When the drainage clogs or the fabric fails, pressure builds behind the wall, especially in spring when bank soils are saturated and lake levels shift quickly.
Freeze-thaw cycles. Water in cracks, joints, and saturated soil freezes and expands, then thaws, dozens of times a year along the waterline. Concrete caps crack, joints open, and every opening lets more water in for the next cycle.
Soil loss behind the wall. When fabric fails or joints open, fine soil washes out through the wall with every wave and every rain. The first visible sign is often a depression or sinkhole in the lawn behind the wall, while the face of the wall still looks fine.
These forces work together. Scour weakens the toe, ice push rotates the top, failed drainage adds pressure, and freeze-thaw widens every crack along the way.
Signs your wall needs attention
Some symptoms are cosmetic. Others mean the structure is already moving. Walk the wall in spring after ice-out and again in late summer, and look for:
- A cap that is tipping toward the water, or a wall face that is no longer plumb
- Gaps opening between the wall and the soil behind it
- Depressions, sinkholes, or soft spots in the lawn within a few feet of the wall
- Cracks in a concrete cap or face, especially ones that widen year to year
- Exposed or undercut stone or footing at the base of the wall when lake levels are low
- Water flowing through joints rather than out of the weep holes
- Rust, bowing, or separating panels on steel or vinyl sheet walls
One sign on its own usually points to a repairable problem. Several together, particularly tipping plus soil loss plus an undercut toe, usually mean the wall is losing the fight.
Seawall repair, replacement, or a rethink
Every wall gets one of three answers, and the right one depends on how far the failure has gone.
When repair makes sense
Repair is the right call when the wall is still structurally sound and the problem is localized. Typical repair work includes:
- Restoring drainage behind the wall by clearing weep holes, replacing failed filter fabric, and rebuilding the backfill with free-draining stone
- Filling voids and sinkholes behind the wall after the drainage problem is fixed, so they do not simply reopen
- Armoring the toe with properly sized stone to stop scour and give the base support
- Replacing or resetting a cracked cap
- Repairing or replacing individual damaged sections
The order matters. Filling a sinkhole without fixing the drainage that caused it buys one season. Fixing the drainage and armoring the toe addresses the forces that are actually breaking the wall.
When replacement makes sense
Replacement becomes the better answer when the wall has rotated significantly, the toe has failed along a long stretch, or the wall material itself is compromised. At that point, repairs keep chasing new damage, and the money spent on patches adds up faster than the cost of doing it once.
A replacement wall on a Wisconsin lake needs the details that original walls often lacked: proper footing depth, engineered backfill drainage, filter fabric that keeps soil in place, and toe protection designed for ice and wave exposure on that specific shoreline.
When to rethink the shoreline
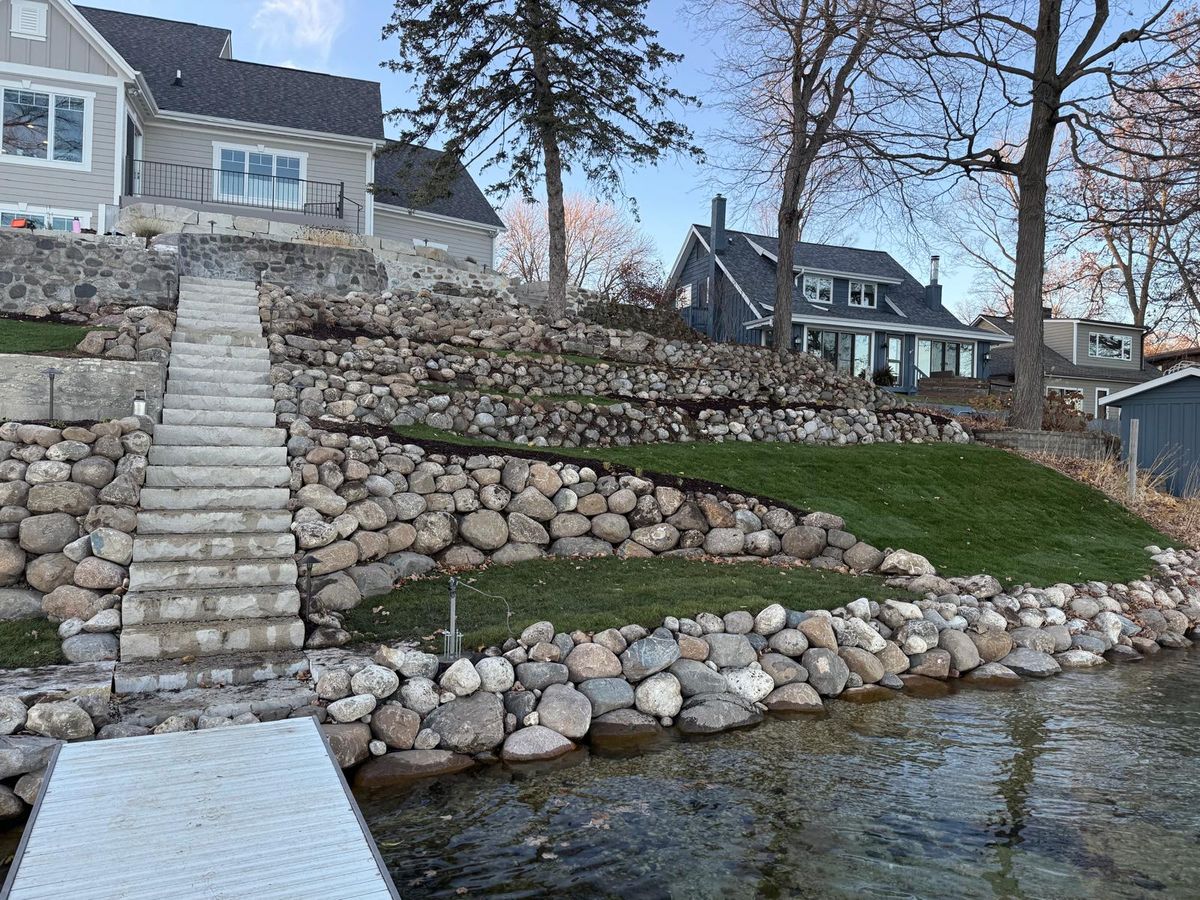
Sometimes the honest answer is that a vertical wall is the wrong tool for the site. On many inland lake shores, graded riprap on a proper slope, or a hybrid with a stone toe and a vegetated upper bank, handles ice and waves better than a wall ever will. Ice rides up a slope instead of pushing against it, and wave energy dissipates into the stone instead of reflecting back to scour the base.
Converting from a wall to a sloped system is not right for every property. Narrow frontage, tight setbacks, existing structures, and how you use the shoreline all factor in. We compare the options in detail in biostabilization vs. seawalls in Wisconsin and living shoreline vs. retaining wall on a Wisconsin lake.
Permits and timing
Work at the water's edge involves more than one set of rules. Anything below the ordinary high-water mark falls under Wisconsin DNR jurisdiction, and work in the first 35 feet of the shoreline also involves county shoreland zoning. Whether a specific repair needs a permit comes down to what is being done, whether the footprint changes, and the site itself.
Replacing or substantially rebuilding a seawall in deteriorating condition usually goes through an individual permit, which we walk through in our guide to DNR waterway permit form 3500-161. Converting to riprap on a qualifying site can often go through the general permit process instead, covered in our GP26 riprap permit checklist. We confirm what applies to your shoreline before any work starts.
Timing is part of the plan too. Permit review takes time, so winter is the right season to assess the wall and start paperwork. Construction typically happens between ice-out and late fall, and lower lake levels later in the season can make toe work easier. Walls that are clearly moving should not wait for a convenient year, because each winter of ice push makes the eventual fix larger.
What drives the scope of a seawall project
Every shoreline is different, and the scope of a repair or replacement is set by the conditions on site, including:
- Length and height of the wall, and how much of it is affected
- Wall type and condition: concrete, stone, steel sheet, or vinyl
- How far the failure has progressed, from a localized drainage fix to full rotation
- Access to the shoreline, whether equipment can reach the wall from the yard or materials need to come in by barge, which we use on steep and hard-to-reach Lake Country lots
- Soil conditions and slope behind the wall
- Permit requirements for the work involved
- Whether the approach changes, from repair in place to replacement or conversion to a sloped system
A site visit is where those pieces come together. We look at the wall, the toe, the drainage, the soil behind it, and how you use the shoreline, then give you a straight answer on whether it needs repair, replacement, or a different approach entirely.
If your wall has started to move, message us and we will come out and look at it before another winter does more of the work.
Planning shoreline or lake access work? See how we approach Lakeside Living